
Hello everyone! This blog is a special one because there are women everywhere that feel the need to hide themselves and their faces due to skin discoloration but that has to change! We are too wonderful to be worried about that! So last night in class (I'm an esthetician student at night) I was receiving a facial and having the oils vacuumed out of my skin. Well who knows if the level was too high or it was left in one place for too long but I happened to end up with a hickey (when blood gets pulled to the visible surface of the skin) along my right eye.
I wasn't upset at all though because it was simply an accident and it allows me the opportunity to make a blog about how to cover it up! So my methods below can easily apply to almost all skin discoloration depending on how severe the color is. If there are any questions, please email me! I love hearing from my viewers!
Makeup: I recently switched over to almost all Almay because it doesn't make my skin feel heavy and it also is very natural for sensitive skin so it doesn't irritate my skin to wear.
And with that, lets begin!

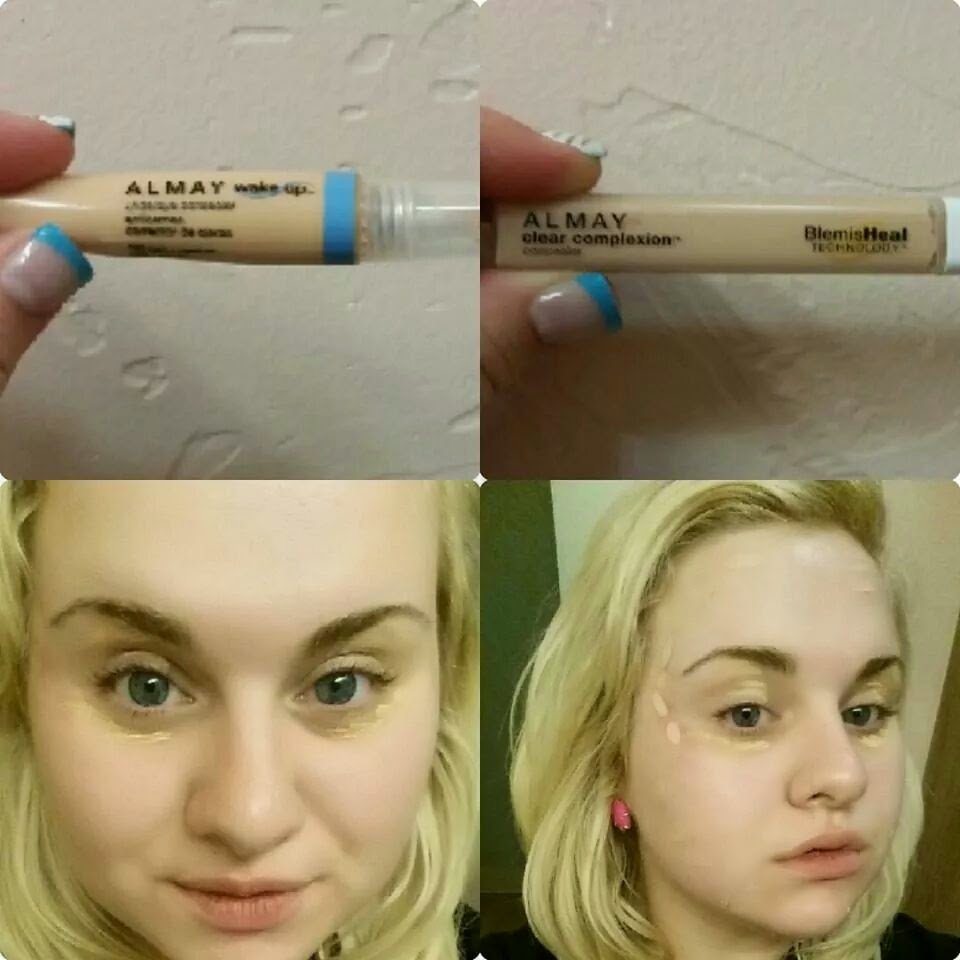
The upper left picture shows my eye concealer, it's called Wake Up, how fitting lol.
- apply that under the eye and on the upper lid.
The upper right picture is the regular face concealer and it looks as if it's in a tube for lipgloss which makes for an easy application.
- apply concealer to the areas that are darker and to areas with pimples like you do your normal concealer.
* For the discolored areas, apply your concealer a little heavier than normal. As you can see in the lower right picture, I have applied thick kind of large rectangular dots down the length of my hickey.
BLEND: for blending, I using my fingers. It is much easier to pat the concealer on the discolored areas to blend it than it is to use a brush and wipe the concealer away from the area it was applied to.
Step 2: Primer.
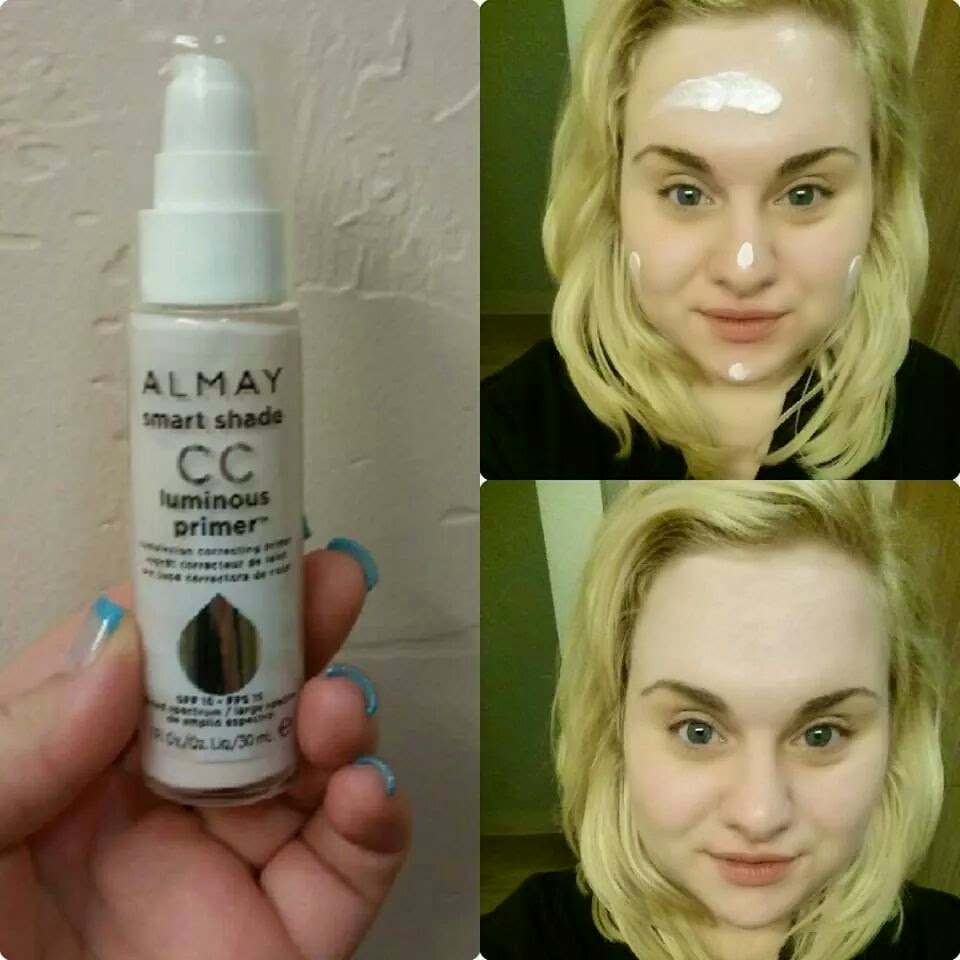
This is the Luminous Primer and it is pink in the bottle. Once on the skin however, it changes shades to match your skin tone. I love primer so I always like to put on a little more so it almost looks like there is a pink tint to my face.
- to apply primers, pump out a little dot onto your finger and put it on your cheek. Do this several times till you have covered your face like in the upper right picture.
BLEND: using your fingers, rub the primer all over your face.
* Be careful though! Dab it on the discolored area because you don't want to rub the base concealer away!

Step 3: Foundation.
The Almay smart shade foundation is seriously the best thing to ever happen to me! No more trying 100 different shades to never have any of them match! I have the light/medium foundation and as you can see on the brush in the bottom left picture, it comes out a cream color. Also, as you can see in the upper right picture, where I have applied the foundation in little sections, the edges have already taken to the tone of my skin.
- apply your foundation in little sections with a foundation brush and then blend it to cover your entire face including your jaw line.
* Where the discoloration is, pat the foundation EVER SO GENTLY because the brush is much harder than your fingers and just a few bristles on that area will remove what you have already applied. I know I'm making this sound scary but it's not. I just don't want you to accidentally remove what you have applied and then have to start all over because I know personally how frustrating that is and I don't want it to happen to you! :)

Contouring can be done several ways and then you just pick the way that works best for you. However, I am going to show you how I do it. For my contour color, I use a Loreal concealer stick that is about 2 to 3 shades darker than my skin tone because I like to add depth to my face. Why I use the Loreal is because Almay likes to focus on smart shade makeup which is amazing, but you don't want your contour to match your skin tone because then it's pointless to even do it. Contouring is good because accents your jawline, makes your cheekbones stand out, and makes your nose appear smaller. To blend the lines though, I use a beauty blender. I have tried contouring brushes before and for me personally, they do not work.
- apply the contouring concealer by drawing a line on your jawline, under your cheekbones, sides of your nose, down your temple, center of your forehead, and then off center of your forehead.
- using a beauty blender, I move it in an upward downward motion for the length of the line to ensure that it gets blended completely. Do this for all of the lines.
* Some of you may not need to contour over your discoloration areas, but I had to over my hickey. So, using the beauty blender, I used a gentle side-to-side movement with a light touch to be sure to only blend out the line. I did not push down hard enough to actually move my makeup.

When I was at Target getting my makeup, this looked to be the closest to a bronze blush.
- apply the blush to the apple of the cheekbones.
+ In the upper right picture where I am sucking my cheeks in, you can see where I have contoured under my cheekbone making it easier to see where I am going to apply my blush.
+ In the lower left picture you can see where I have applied blush to my right cheek (your left).
In the bottom right picture, I have applied blush to both cheeks and you can see how it sits on the apple of my cheekbones right above where we contoured.
* If the discoloration is on your cheeks, simply dab the blush on very lightly. If you want a more intense blush color, simply dab more on. Be sure not to do too much though cause if you need to wipe the blush off, you're going to take your makeup off with it over the discolored areas.

This is the smart shade powder for medium light skin and it is amazing! Powder is great because it "sets" everything onto your face. You can put makeup on, but powders job is to make sure it stays on.
- apply powder buy simply brushing it over your face.
* When on your discolored areas, be gentle!!

Step 7: The Brows.
This is a brow kit I got at Sally's Beauty Supply and I just love it!
- apply a darker brown shadow, or black if you prefer, to your eyebrows using a small eyeshadow brush.
In the upper right picture, I have filled in my right eyebrow (your left).
In the lower right picture, both are filled in.

Step 8: Mascara.
I bought a new Almay voluminous mascara and the color is sapphire which is a shade of blue and I love it because from a distance it is dark but is not black when up-close.
- apply to your lower lashes first, and then your upper lashes.
In the bottom left picture I have applied my lower mascara.
In the bottom right picture, I have applied my upper mascara.

Step 9: Lips.
This is a Revlon lip stick and this color is Audacious because I really love orange lips right now. I think it is a very good color for summer.
- apply it to your lips like normal lipstick.

And there you have it!
Hickey be gone!
XOXO Lala
No comments:
Post a Comment