
Every time a girl is going to go on a date, the questions always come up: What am I going to wear and how am I going to do my makeup? Well I do not know everyones date night style but this is my idea of a date night look, I hope you enjoy!

Always begin to apply your makeup on a clean face. Those pores do not like to get clogged!

Foundation. Not everyone wears it but I encourage it because it evens out your skin tone and lets you have an even surface to put makeup on. Be sure to cover your lips in foundation too because sometimes dark colors of lipsticks and lipglosses travel up the lines in your lips and foundation helps to lock your lipstick or lipgloss into place. Powder also has the same affect.

Powder. I love powder and I apply it in circles to make sure that I get full coverage. It locks everything in. Also when putting on your powder, don't forget to put it on your neck as well! You don't want people looking at your neck and being able to see where your makeup starts!

Eyes: For your eyes you will need 3 colors. I have a nude, a salmon pink, and a shimmery dark brown.
Step 1: Use your nude shadow for your base. Apply it to your upper and lower lids.

Step 2: using your pink color, apply it to the upper lid only, not by the eyebrows.

Step 3: using your dark brown, create your crease. Also, using a smaller brush, use the same brown on your bottom lid to give it some depth.
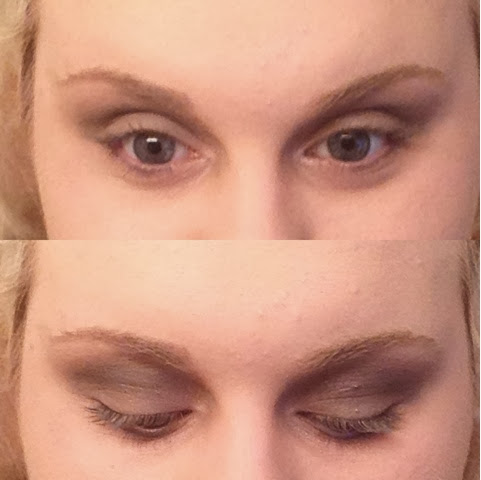
Step 4: using your nude base shadow and a brush, begin to blend your crease up into the area by your eyebrow. It blends your crease so that there are no harsh shadow lines but also it puts more base color up top so that your crease does not take over the part of your lid by your eyebrow.

Step 5: Fill in your eyebrows! Your eyebrows are so important because they bring a look together, or they are the piece that is missing. Ever look at a picture and notice the face is off a little? Next time you do, look and see if the eyebrows are filled in, 9 times out of 10, that's why!

Step 6: Create your cat eye! (The Cat Eye tutorial is posted!!)

Step 7: I used a navy/aqua blue eyeliner pencil, but you can use any color you'd like on this part because this is where I like to add just a pop of color by applying eyeliner to my waterline.

Step 8: apply your bottom mascara. The number 1 rule I live by when it comes to applying mascara is always put the bottom on first. If you put it on your top lashes first, that is just fine. But if you use wet mascara and don't wait a couple of seconds for it to dry, you will have tiny dots under your eyebrow because you look up to put on bottom mascara but you are looking straight ahead when you apply top mascara so you don't have all of the little dots.

Step 9: apply your top mascara! Be sure not to put too much on though because we are going to put on dark lips and you don't want your mascara to be too dark and overtake your lips.

Blush. For this look I used Nars Exhibit A red blush because when toned down it's very pretty. The great thing about blush though is that if you ever put too much on like I did in this picture, you can simply apply more powder to tone your blush intensity down.

Here I have applied more powder to my cheeks to tone down the red blush.

Now, apply a dark red or dark purple lipstick or lipgloss and your look will be complete. I love the dark lips with these eyes over a nude lip in this case because we used pinks and browns, not nudes and browns. Also, I think the dark lips go well with the red blush!
:) Thank you!
No comments:
Post a Comment